
Step-by-step: exactly what we need
Follow this protocol to ensure your scans, photogrammetry, and photos meet the precision our lab requires.
First Appointment
Initial Scan & Photos (Pre-Surgery)
Intraoral upper arch scan
Capture very wide — all palatal and retromolar tissue.
Intraoral lower arch scan
Capture as much tissue as possible, full vestibule.
Bite scan
Patient in maximum intercuspation.
Soft tissue scan
Capture the full gingival architecture.
Patient photos
Passport format: eyes at camera, big smile, closed bite.
Second Appointment
Surgery & Photogrammetry Capture
Pre-surgery scan with fiducial markers
Place markers in retromolar areas for digital alignment reference.
Implant surgery
Place implants and healing abutments per treatment plan.
Post-surgery scan with healing caps & fiducial markers
New tissue scan capturing the post-surgical architecture.
iCam4D photogrammetry capture
iCamBody markers placed on multi-units; iCam4D scanner captures implant positions.
Third Appointment
Immediate Temporary Delivery — 24 Hours
Immediate temporary insertion
Full-arch temporary delivered within 24 hours of surgery.
How to capture the perfect scan
Detailed guidance for each scan type and patient photo.
upper Scan
Capture the upper arch very wide — include all palatal tissue and extend to the retromolar areas. The more tissue captured, the better the digital alignment.
lower Scan
For the lower arch, capture as much tissue as possible. Extend posteriorly to cover all retromolar tissue and the full vestibule.
bite Scan
A clean bite scan is essential for accurate occlusion. Ensure the patient is in maximum intercuspation.
Patient Photos
Patient photos must be in passport format: eyes looking directly at the camera, big smile with a closed bite. Neutral background, frontal, profile, three-quarters, and extreme close-up.
Photo Requirements
Passport format — eyes at the camera, big smile with closed bite. Neutral background.

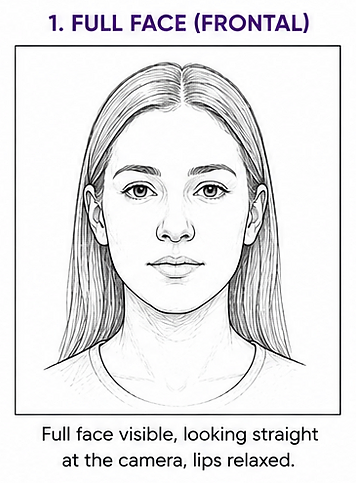
Full Face (Frontal)
Full face visible, looking straight at the camera, lips relaxed.

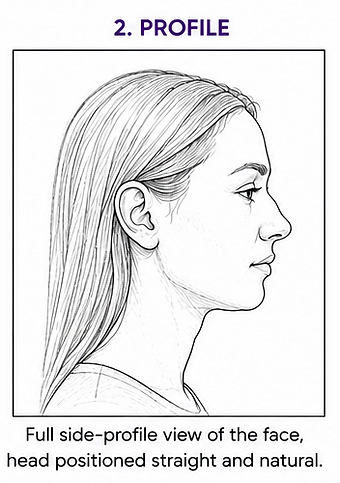
Profile
Full side-profile view of the face, head positioned straight and natural.

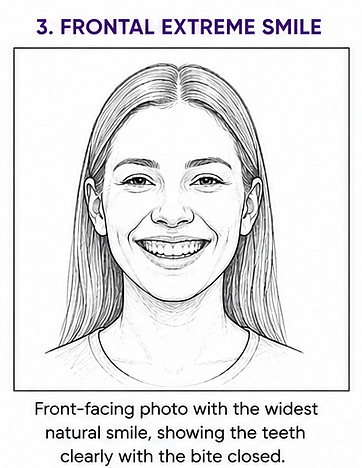
Frontal Extreme Smile
Front-facing photo with the widest natural smile, showing the teeth clearly with the bite closed.

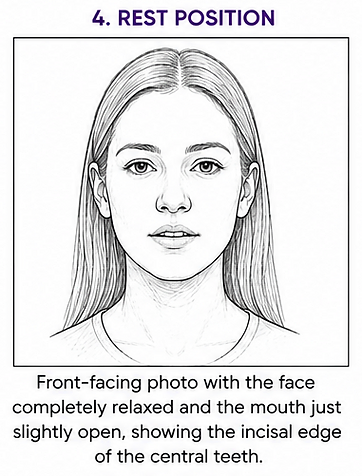
Rest Position
Front-facing photo with the face completely relaxed and the mouth just slightly open, showing the incisal edge of the central teeth.
General Requirements: Use good, even lighting, avoid shadows, keep the camera at face level, remove sunglasses or other accessories, and ensure the entire face is clearly visible.
Essential Landmarks — Digital Scans
High quality digital scans are essential for accurate planning and successful outcomes. Always verify coverage of all key anatomical landmarks.

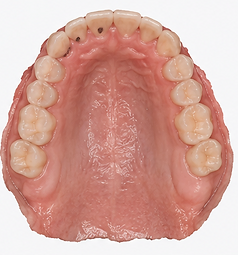
Maxillary Tissue Scan
Include all keratinized gingiva and vestibule for accurate soft tissue mapping. Capture the full palatal vault and tuberosities to ensure complete upper arch coverage.

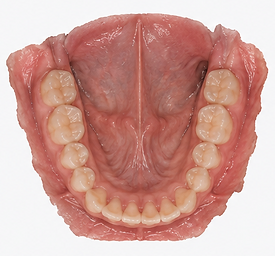
Mandibular Tissue Scan
Extend to retromolar pads and full vestibule for complete lower arch coverage. Capture all keratinized gingiva to ensure accurate digital alignment and restoration design.